Monday, April 22, 2013

Yard, Barn, Front Stoop, and a Bedroom

Starting today with some non-project pictures from around the yard...  

When I arrived Saturday morning I found a visitor in the yard.

I love it out here at night - it's very quiet, very dark, and very peaceful.  Moon over the barn:

Oak tree in the field behind our house.  I've seen lots of deer in this field, and the neighbors have warned me that there are lots of coyotes around.  With carnivores around we'll keep an eye on Leo, but in general, we're excited to live among wildlife!

Large puddle (small pond?) in the back yard - I think it might have been a swimming pool at one point, which was filled in, then settled, leaving a low/damp spot.  I planted a bunch of shrub willow here.

And not so much the house, or even the yard, but a few future inhabitants of the house:


OK, on to projects.  Meg has made amazing progress on the corner bedroom.  Here it is with the wallpaper stripped, some lower paint chipped away, low spots mudded, and some sanding done.  (Note the contraption on the bucket - that's a "Dust Deputy" cyclonic separator that hooks to a shopvac, which is made by Oneida right here in CNY.  A vast majority of the particulate stuff picked up by the vac spins around in there and drops into the bucket before going to the shopvac.  This prolongs the life of the filter and speeds everything up - it's a lot easier to dump a bucket than to clean a filter and dump a whole shopvac!)


Already primed!

For me, Sunday involved another Lowe's run, and fixing the front stoop.  I think there are pictures in one of my first posts that show how the concrete on this stoop is just falling apart, which means the metal supports that hold the bit of roof above the stoop are... precariously perched.  Both the home inspector and our homeowner's insurance flagged this area as a potential hazard.  
I started by jacking up the roof a little, and temporarily supporting it with angled posts.


Then I put down new pressure treated wood, which is attached to the concrete with outdoor "Landscape" adhesive caulk and Tapcon screws.  I cut down the permanent support posts a bit with my angle grinder (made lots of sparks) to account for the difference in height, put them back in, and lowered the roof down onto the new wood.  Granted, this doesn't really do anything to keep the concrete from falling apart.  But with the wood planks like this, the steps would have to completely disintegrate before the support beams are in danger of collapsing.
The wedges like this are temporary - I need to brace it much more securely before calling it done.  We don't intend to use this door much (the back door seems to be the main entrance).  But whenever this is used, I have to assume people might grab the support posts as hand holds, or kids might swing on them, or whatever.  So in addition to supporting the weight of the bit of roof, they need to tolerate some lateral force. I also haven't finished attaching the decking boards closest to the door, but the hardest part is definitely done.


Finally, a big barn project, that mostly involved testing the limits of my respirator mask.  (Happy to say it passed handily - despite some of the worst dust I've worked in, I didn't cough or sneeze once.)  On Saturday I cleaned out the portion of the barn that will become my shop!  This needs to be done before I can move my shop - I want to get some sort of flat-ish wood floor installed, and at least frame the walls before moving the bulk of my stuff.  I eventually want to insulate this shop room to some degree (no pun intended), but the insulation can wait until later this summer or fall if necessary.  
I plan to put my shop in the middle "room" of the main part of the barn.  This middle "room" had previously been split into two horse stalls, with a walkway between them.
"Before" view from the north, looking at the two stalls:

"Before" veiw from the south, looking at the two stalls.  Also note the little room at the far right - that's the well head, pump, and pressure tank for the whole house.  Also note the angle grinder - this is also an "after" picture, because I had just cut off two bolts that had been set into the concrete and were sticking up out of the floor.  

A few more "before" pictures.  Like I've mentioned previously, the whole barn was covered in cobwebs, dust, and hay.  Ew.


The flash really brings out the creepiness:
Saturday's dirty project involved knocking down a few stall walls, and getting rid of all that dust/cobweb/hay nastiness!  I started by using a snow shovel to scoop out the first layer of crap that was on the floor.  I don't think too much of it was literal crap, but there was plenty of stuff that I didn't poke through too carefully - mostly rotted wood, horse bedding, and horse food, I think.  Once I got the shovel-sized stuff out, I swept out the ceiling to collect/knock down most of the dangling goodies, and shoveled again.  Results of shoveling filled up most of a contractor bag.

Then I shop-vacced the floor:
And also shop-vacced the walls and ceiling, to pick up anything the broom missed.  I used the "Dust Deputy" described above, and filled up the 5-gallon bucket three times.  That's after shoveling out all the big stuff.  But the shop area now looks much better!


Removing the wire mesh "windows" was a lot more difficult than I thought.  (No, not the screens in the photo immediately above - the big fence-like mesh in the earlier photos.)  Whoever installed it used good heavy-duty staples, and pounded them in nice and tight.  The staples were tough to pry out, and the fence didn't want to let go.  I ended up going through with my angle grinder and cutting each individual staple.  THEN the wire mesh let go easily!  It was easy to flatten/pound in the exposed sharp edges of the staples that remained in the wood.

And here's all the decent quality, full-length lumber that used to be on these stalls (stacked under the ladders).  There is another stack almost as large of short, or damp, or partially rotted, partially horse-chewed bonfire material stacked outside.

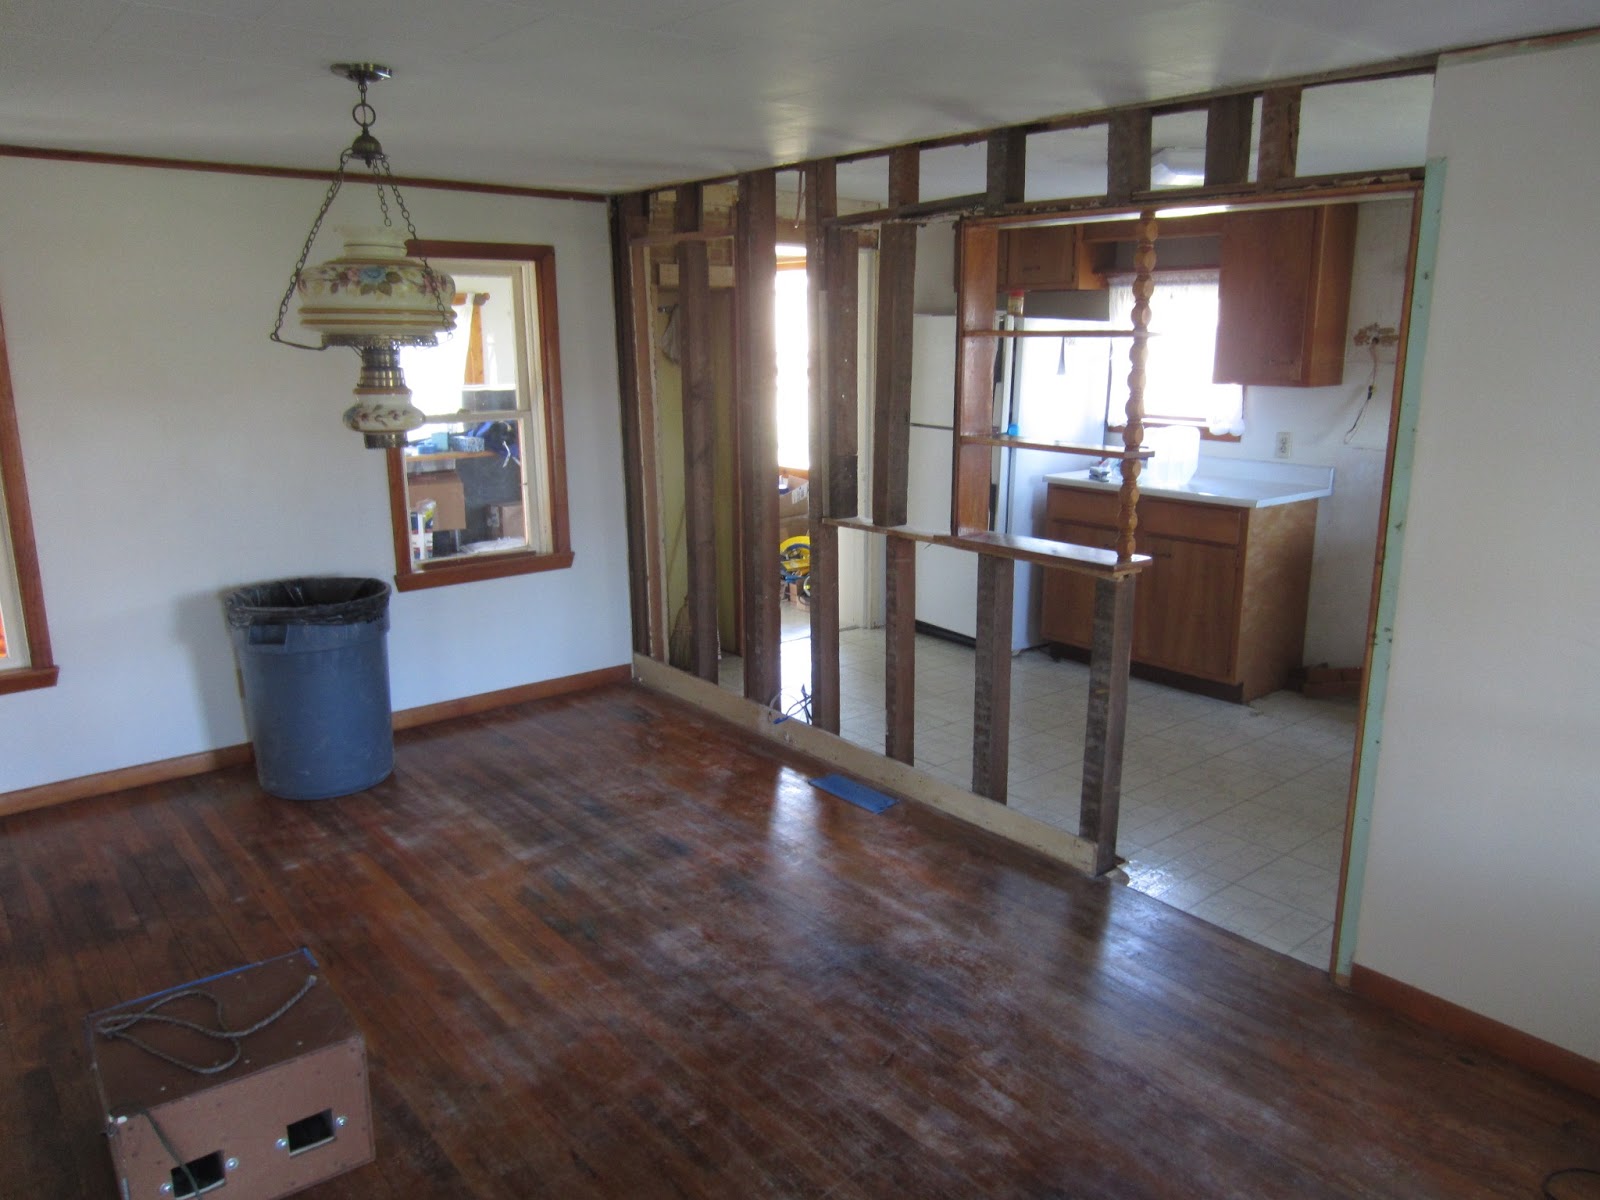
Finally, I made a little more progress on taking apart the kitchen wall.  Even though the short partial studs were not tied to anything useful, and were not serving any structural purpose, they are still built into the framing of the house, so plenty of nails are buried deep under the floor or above the ceiling.  Cutting them seems to be the only option.  I'd just like to take this opportunity to say I'm REALLY impressed with my Ridgid 18V cordless tool set.  I bought the drill new (to take advantage of their lifetime warranty on batteries) and found the other tools (impact driver, recip saw, circ saw) for cheap on ebay.  Both saws and the drill seem to have every bit as much power as any corded tool I've used.  I've used and abused them a good bit already, and have yet to bog anything down.  I've done what I consider some pretty serious cutting and drilling, and haven't even unpacked my corded tools.  Good stuff.  Anyway, here's the disappearing kitchen wall:


Wednesday, April 17, 2013

Learning new skills, and... Smashing Stuff!

I expected I'd be teaching myself a few new skills as a part of this renovation, and sure enough, I can now add "PVC cementing" to my list of "Skills in which Andy has Dabbled."  I'm far from an expert, but by the time I was done with this particular plumbing project, I felt proficient.  The heavy rain last week revealed that the ONLY reason the basement hasn't flooded is that the previous owners had installed a good-quality sump pump.  I walked into the house after a day of rain, and heard a dripping sound from the basement - turns out it was water dripping into the sump pit, and the pump was doing its job!  But what if said storm was accompanied by a power outage?  The basement would be flooded in short order.  So I installed a battery backup sump pump.  I used a Wayne ESP-25 pump/control unit, and a "31DP-6" deep cycle Marine/RV battery.  I caught the pump when Amazon had it discounted, and used a nice $40-off coupon from Advance Auto Parts for the battery.  I used my regular 7%-off Home Depot gift cards (purchased through Cardpool.com) for the PVC, and I'm happy with the way it turned out.  The sump pump outflow pipe location could be improved, drained farther from the house, and maybe buried deeper, but that can wait.  At least the water is leaving the basement, and will continue to do so during a power outage.
Here's the Before shot - flex tubing is used almost immediately after the check valve - it's apparently better to avoid flex tubing whenever possible, especially around bends.  Sorry for the odd cropping - I couldn't back up enough to get the whole thing in the frame on my phone's camera.

Here's the After - more PVC all the way up (including the bend at the top, not shown).  Several PVC joints, and they all held just fine!  PVC cement is some serious stuff - it sets VERY quickly and produces a VERY strong bond.  Impressive.  Maybe I'm just used to wood glue - which also produces a very strong bond, but requires at least an hour or so of clamping to accomplish this.
 
 And a shot showing both pumps - the pit is a little crowded, but that shouldn't be a problem.  I'll eventually work on making a good cover for it.

Besides plumbing in the basement, I also added a good latch to the door leading out to the Bilco (cellar) door.  There was a knob installed previously, but it was not good quality and we don't have a key to lock it.  This latch (above the knob) came from one of the horse stalls I removed from the barn - I love this heavy, simple hardware.  Good for this application - easy to unlatch from the inside, impossible to break in from the outside (short of destroying the entire door).

While on the topic of the basement, I had appliance repair people come do a thorough cleaning/servicing of the furnace.  The house came with a Thermo Pride oil burning furnace, about 5 years old, and I've heard nothing but good reviews of this brand.  The repair people said it was clean and in good shape, and of course I'd like to keep it that way.  I've heard that yearly maintenance, including changing oil filters (similar to a car) and replacing the nozzle (buried inside the furnace) is critical to keep the furnace in good shape.  I hope to do this basic maintenance myself, and just have the pros come out every few years, since their "yearly" maintenance visit costs $150.

On to the next new skill - trailer wiring!  I think I mentioned that I bought a utility trailer to help move, and to transport equipment like a tractor.  I'm still very excited about this trailer.  It's sort of like owning a pickup, but cheaper, and I still get to drive my little high-mileage car to work.  The trailer was a great deal at Lowes, but it came with a broken wire.  You can see the loose bare wire in the background that is supposed to be connected into this harness.  This is a ground wire that was disconnected, which resulted in the trailer brake lights still working, but the marker/running lights not working.  I decided it was easier to fix the wiring rather than taking it back to Lowes and complaining to them, so I tied all three wires together (using a wire nut and tape and two cable ties), and it works fine.

I also added some pressure-treated wood decking, because the wire mesh deck would not have been sufficient to hold a tractor.


And speaking of tractors, I'm going to pick one up tomorrow!  I found a used Craftsman GT5000 on Craigslist.  Sure, it would have been nice to get a John Deere - everyone loves green tractors.  I've kept a very close eye on used models for the past couple months, and good used JD tractors in the sizes I would like start about $2000. The Craftsman I found is near the top of their line, with a very good engine (Kohler Command Pro 25hp), a nice wide mower deck (54"), and a fairly heavy frame (approaching those on the $2000 JDs), and it cost less than half as much as the JDs.  For less than half price, I'll settle for a non-green tractor.  I'm hoping to get a plow blade for it, so it might be useful for snow removal also - but we'll probably hire someone with a real plow any time we get more snow than a little tractor can handle.

Back to house projects - I SMASHED MORE STUFF!  Er - I mean - I did some more demolition work in preparation for important renovation projects.
Starting in the bathroom - there was a weird little wall in front of the tub, which allowed easier access to the tiny bedroom, but significantly blocked access to the tub.  Since we'll be bathing two little boys and a dog, we want easy access to the tub!  So I knocked down the wall.  More plaster and lath, lots of dust, a few smallish mouse nests, but no more treasures in the wall.  I taped plastic over the entrance to prevent dust from getting all over the house, and blocked the heat duct so we won't get a cloud the next time the furnace runs.  Wall removal went fairly easily - I'm finding that since the (original) house was constructed in timber-frame style with such huge beams, many walls are not load-bearing, which makes demolition much easier.
A few before pictures, WITH the bathtub-blocking wall:

(Remember the bathroom carpet?  Right.)

A few in-process shots.  Two slightly odd things about this wall: it was hiding a dangling wire (fortunately, taped off at the end) and a DOOR FRAME.  I have no idea why a door had been framed into this wall - makes no sense to me in terms of house layout.

 Everyone loves a nice seductive self-portrait-in-the-bathroom-mirror...
 Here's the wall - in the bathtub, of course.  Minus the plaster and drywall, which had been carted out in contractor bags.
 I blew out the first pair of work gloves.  I'm sure I'll go through a few more by the end of the project, but this was still kind of sad - I'd had these a long time, and they were very nicely formed to my hands.
 And AFTER: one bathroom, without a wall.  It really makes the bathroom feel bigger!  OK, it's still not a big bathroom, but it's definitely an improvement.


Next up: the dining room.  I've already shared pictures of part of this demolition - I tore down the kitchen side of this wall.  Today I did the dining room side.  This side was a little more complicated in terms of containing dust, but I put up plastic sheeting over doors, propped a fan in the window, and ran my home-made air cleaner (squirrel-cage fan in a box with multiple furnace filters).  This seemed to do a good job of keeping the dust in one room.
Before:
Trim removed, plastic up, ready to smash!
 Demolition in process!  I started by crawling under the plastic from the kitchen, and just smashing the wall out toward the dining room.  Pushing and smashing was MUCH quicker and more satisfying than pulling/prying.

Yes, that is wood-grain printed wallpaper applied over the plaster, which was buried under a layer of drywall.  Wow.


While cleaning up, I didn't have a problem seeing where I had already shop-vacced.


And done!  I'll take out the framing soon.  Almost none of it is structural - see how the partial studs don't line up?  There's a great big timber frame beam running right above this wall, which basically acts as a giant header.  We'll probably leave the full-height doubled 2x4 stud intact, which will be at one end of our island.  This will provide a little bit of support, just in case it's needed, and also provide a place to run wiring.  Even though the framing is still in place, the dining room looks much brighter and more open!
View from the kitchen.  The brown box on the dining room floor is my air cleaner.  I made this several years ago for use in my woodworking shop.

 Detail of the odd framing - note the cardboard "header"...

One last mini-project - one of the street numbers on the front of the house had broken, so I replaced it.  Even though that took all of about 3 minutes (including drilling out the aluminum number to allow use of a larger nail), it was surprisingly satisfying - as if it made our new address official.

To wrap up, we're starting to enjoy some "projects" that were done at some point in the past by the previous owners of this house - the spring bulbs are coming up!  Hooray for spring, and for a head-start on flower gardens!


Wednesday, April 10, 2013

It's Ours - and We're Diving In!

We closed on the house last Monday, and we're happily diving in to projects!  First, a couple of introductory pictures.
Most of the property, from the street:

View of the lake (you can't see it from our property, but you can from about 1/4 mile down the road!)

Happy homeowning family!

A close-up of the REALLY classy lamp.  Alas, we'll be replacing it with something I can walk under, but we'll have to keep this thing around somewhere!

Baby lunchtime in the new house


Back to projects.  First, and most important from our current housing perspective, we've been able to move several bulky and seldom-used items to the new place.  We're thrilled to have even a little more floor and storage space in our current apartment!  The stuff we've moved is mostly on a shelving unit I made for the barn.  (Commercial "tough" shelves run about $50 on sale; I made some shelves out of dimensional lumber and OSB, at least double the size, for about the same price.  Pics below.)  Storing things in the barn necessitated CLEANING the barn - somehow every single surface was coated with dust, cobwebs, and hay.  I have no idea how hay was spread so evenly on every single surface.  For example, the south "room" of the barn:  (check out those ceiling joists!)

The north end of the barn is a more recent addition, and we decided to use this portion for storage.  This is the only real "room" in the barn - it's actually somewhat isolated from the main structure.  You can see the red wall of the original barn structure.

The rest of the barn is split into three "rooms" by horse stalls, most of which I'll eventually remove).  I spent several hours shop-vac-ing the floor and walls of the north room, and removed a few horse stall doors, and we have some clean(er) storage space.

The whole point of waiting to move into the house is to prevent dust from getting in all our stuff, and to prevent our stuff from getting in the way of remodeling.  Barn storage is perfect, and much appreciated!  Here's the shelf in position in the north room, with just a few early storage items.  It has since been filled considerably.

Meg's first dive was into wallpaper removal.  She first tried some spray-on gel, which did almost nothing.  Then she tried a steamer (interestingly, $5 cheaper at Home Depot than Lowes...), and it worked wonderfully!

Before & During:


My first project inside the house was the kitchen.  Started with the light fixture, so I could see what I was doing for the rest of the projects.  This new fixture takes two circular tube bulbs, one the same size as the previous fixture and one larger, so it's more than twice as bright.  And I think it looks just a little better...
Before & After:


The next kitchen job was exploring inside the wall that we'd like to remove, and replace with an island.  This will open up a lot of space between the kitchen & dining room, and give us a little more floor and counter space in the kitchen.
A series of progress shots:


Getting ready to pry off the first piece of trim!  Soon after this picture was taken, I removed both the upper & lower cabinets visible at right.


(Yes, there is a layer of CARDBOARD in the wall, underneath the brick-print linoleum stuff...)

It's hard to identify the various wall-covering materials from the picture, but just in this one wall section, I removed drywall, plaster & lath, and tongue & groove boards.

Most of the wall covering is removed, most of the dust, plaster, insulation, and nastiness is shop-vac-ed up.  (I put the shopvac outside and used a long hose, and wore a mask or respirator the whole time, just assuming there is lead, asbestos, arsenic, or other nasties in the dust.)  This was apparently an outside wall at some point, and framing for a window and door are clearly visible.  Note that there is NO header beam, and most of the existing studs are not directly above anything that can bear weight - so it shouldn't be any problem to remove this wall.  Can't wait to open it up!

Here's a view from the other side of this wall.  I stacked a few cabinets where we will eventually put the island.

Next stop: the bathroom.  Started by removing the carpet, which in my opinion resulted in an immediate improvement to the room!

(Our plan is to move the door out to the arched entryway, and remove the wall that was added in front of the tub.)


Speaking of carpet, I removed some colorful shag (and ceiling tiles) from two upstairs bedrooms:


The third upstairs bedroom (the one we'll eventually turn into a bathroom) doesn't have carpet, but it does have FOUR different types of vinyl/linoleum floor coverings: 


And finally, I started exploring in the wall of what will become our laundry room.  This was necessary to figure out how we'll run plumbing into this room.  This room was an addition (maybe 1950's?), and the crawlspace underneath it has almost no access and is way too shallow to maneuver.  Anyway, here's the wall as I started removing plaster and lath.  To remove the plaster, I first scored the wallpaper with a knife, then used a masonry chisel to define the boundary of my section and start shattering the plaster.  It came off quite easily once I had chiseled in around the edges.  When I could see that there was no wiring or plumbing behind the lath, I cut down along the studs with a sawzall.
Note that the lath is a mix of milled boards (straight, rectangular) and "accordion lath," or wider boards that were split apart along their grain (wavy, angled gaps) and "stretched" before nailing.  As with most old wood stuff, I find it fascinating. 

Lo and behold, I found my first old-house-wall-treasure!  I was expecting to find odd stuff in the walls, and while it's probably not monetarily valuable, I though this was a good find.

An old flashlight, with the switch in the "on" position.  I wonder if someone was looking down from the attic and dropped it?  Pretty cool, anyway.

And why was the flashlight sitting in the wall a foot above the floor?  It was resting on my next wall surprise - HUNDREDS of butternuts, mixed into a mass of pine needles and small corncobs.  After the trees leaf out, it will be interesting to see whether there are any butternuts around...  But the only 50+ year-old trees in the immediate vicinity are red pines, oaks, and maples, so I suspect the tree that bore these nuts is long gone.


This is more of the squirrel stash - not including the significant portion that'd already been vacuumed up.

 All cleaned up.  Based on a measurement from these wires in the basement, it looks like we'll be able to drill up through a beam directly into this wall to run plumbing for the washing machine.  What a relief!  (For a while I thought the rock foundation would interfere with the installation of water and drain lines.)  Despite all the weirdness inside the walls, I smile every time I see these big thick wall studs mortised into even thicker floor beams...  There's a reason this house has stood so well for 130+ years.

I've also spent quite a bit of time over the past few days talking to general remodeling contractors and plumbers, so as soon as they get back to me with estimates, we'll probably be starting the professional side of some projects.   We're definitely going to hire someone to connect us to public water (must be a licensed plumber, and that's way beyond my experience or comfort level), and replace the roof (I have a little bit of experience with roofing, but it was a long time ago, I definitely wouldn't want to work up there alone, and it would take me way too long to re-learn and do it all on my own.)  We'll probably also hire someone to do most of the interior plumbing, refinish the oak floors, and install a few windows.  Beyond that, I'll see how much I can accomplish on my own in the next ~2 months!  It also looks like I'll be able to work something out with the contractor where I can do the demolition work (removing walls or windows), they do the basic installation of the new stuff, and I'll do the finish work.  We'll see what is most efficient in terms of time and budget.