
Here's the Before shot - flex tubing is used almost immediately after the check valve - it's apparently better to avoid flex tubing whenever possible, especially around bends. Sorry for the odd cropping - I couldn't back up enough to get the whole thing in the frame on my phone's camera.

Here's the After - more PVC all the way up (including the bend at the top, not shown). Several PVC joints, and they all held just fine! PVC cement is some serious stuff - it sets VERY quickly and produces a VERY strong bond. Impressive. Maybe I'm just used to wood glue - which also produces a very strong bond, but requires at least an hour or so of clamping to accomplish this.


Besides plumbing in the basement, I also added a good latch to the door leading out to the Bilco (cellar) door. There was a knob installed previously, but it was not good quality and we don't have a key to lock it. This latch (above the knob) came from one of the horse stalls I removed from the barn - I love this heavy, simple hardware. Good for this application - easy to unlatch from the inside, impossible to break in from the outside (short of destroying the entire door).

While on the topic of the basement, I had appliance repair people come do a thorough cleaning/servicing of the furnace. The house came with a Thermo Pride oil burning furnace, about 5 years old, and I've heard nothing but good reviews of this brand. The repair people said it was clean and in good shape, and of course I'd like to keep it that way. I've heard that yearly maintenance, including changing oil filters (similar to a car) and replacing the nozzle (buried inside the furnace) is critical to keep the furnace in good shape. I hope to do this basic maintenance myself, and just have the pros come out every few years, since their "yearly" maintenance visit costs $150.
On to the next new skill - trailer wiring! I think I mentioned that I bought a utility trailer to help move, and to transport equipment like a tractor. I'm still very excited about this trailer. It's sort of like owning a pickup, but cheaper, and I still get to drive my little high-mileage car to work. The trailer was a great deal at Lowes, but it came with a broken wire. You can see the loose bare wire in the background that is supposed to be connected into this harness. This is a ground wire that was disconnected, which resulted in the trailer brake lights still working, but the marker/running lights not working. I decided it was easier to fix the wiring rather than taking it back to Lowes and complaining to them, so I tied all three wires together (using a wire nut and tape and two cable ties), and it works fine.

I also added some pressure-treated wood decking, because the wire mesh deck would not have been sufficient to hold a tractor.

And speaking of tractors, I'm going to pick one up tomorrow! I found a used Craftsman GT5000 on Craigslist. Sure, it would have been nice to get a John Deere - everyone loves green tractors. I've kept a very close eye on used models for the past couple months, and good used JD tractors in the sizes I would like start about $2000. The Craftsman I found is near the top of their line, with a very good engine (Kohler Command Pro 25hp), a nice wide mower deck (54"), and a fairly heavy frame (approaching those on the $2000 JDs), and it cost less than half as much as the JDs. For less than half price, I'll settle for a non-green tractor. I'm hoping to get a plow blade for it, so it might be useful for snow removal also - but we'll probably hire someone with a real plow any time we get more snow than a little tractor can handle.
Back to house projects - I SMASHED MORE STUFF! Er - I mean - I did some more demolition work in preparation for important renovation projects.
Starting in the bathroom - there was a weird little wall in front of the tub, which allowed easier access to the tiny bedroom, but significantly blocked access to the tub. Since we'll be bathing two little boys and a dog, we want easy access to the tub! So I knocked down the wall. More plaster and lath, lots of dust, a few smallish mouse nests, but no more treasures in the wall. I taped plastic over the entrance to prevent dust from getting all over the house, and blocked the heat duct so we won't get a cloud the next time the furnace runs. Wall removal went fairly easily - I'm finding that since the (original) house was constructed in timber-frame style with such huge beams, many walls are not load-bearing, which makes demolition much easier.
A few before pictures, WITH the bathtub-blocking wall:

(Remember the bathroom carpet? Right.)

A few in-process shots. Two slightly odd things about this wall: it was hiding a dangling wire (fortunately, taped off at the end) and a DOOR FRAME. I have no idea why a door had been framed into this wall - makes no sense to me in terms of house layout.


Next up: the dining room. I've already shared pictures of part of this demolition - I tore down the kitchen side of this wall. Today I did the dining room side. This side was a little more complicated in terms of containing dust, but I put up plastic sheeting over doors, propped a fan in the window, and ran my home-made air cleaner (squirrel-cage fan in a box with multiple furnace filters). This seemed to do a good job of keeping the dust in one room.
Before:

Trim removed, plastic up, ready to smash!


Yes, that is wood-grain printed wallpaper applied over the plaster, which was buried under a layer of drywall. Wow.

While cleaning up, I didn't have a problem seeing where I had already shop-vacced.

And done! I'll take out the framing soon. Almost none of it is structural - see how the partial studs don't line up? There's a great big timber frame beam running right above this wall, which basically acts as a giant header. We'll probably leave the full-height doubled 2x4 stud intact, which will be at one end of our island. This will provide a little bit of support, just in case it's needed, and also provide a place to run wiring. Even though the framing is still in place, the dining room looks much brighter and more open!
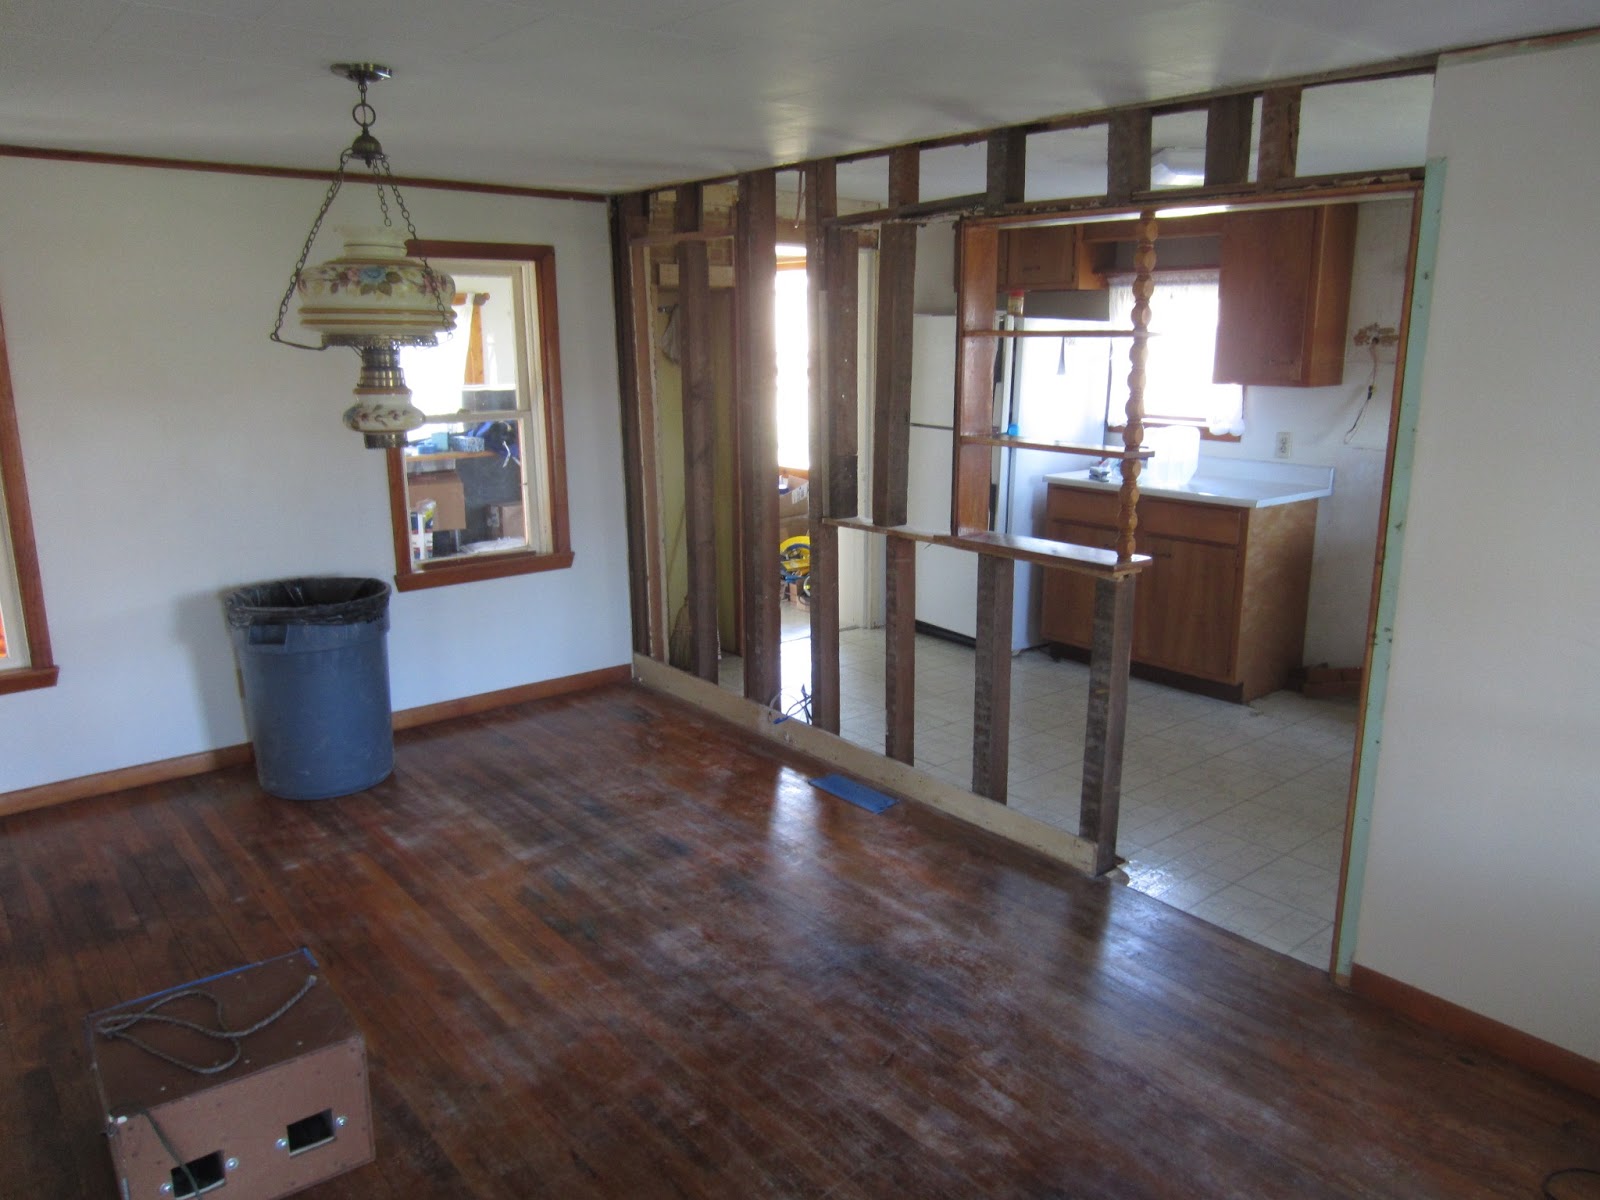
View from the kitchen. The brown box on the dining room floor is my air cleaner. I made this several years ago for use in my woodworking shop.


One last mini-project - one of the street numbers on the front of the house had broken, so I replaced it. Even though that took all of about 3 minutes (including drilling out the aluminum number to allow use of a larger nail), it was surprisingly satisfying - as if it made our new address official.

To wrap up, we're starting to enjoy some "projects" that were done at some point in the past by the previous owners of this house - the spring bulbs are coming up! Hooray for spring, and for a head-start on flower gardens!

No comments:
Post a Comment