
Most of the property, from the street:

View of the lake (you can't see it from our property, but you can from about 1/4 mile down the road!)

Happy homeowning family!

A close-up of the REALLY classy lamp. Alas, we'll be replacing it with something I can walk under, but we'll have to keep this thing around somewhere!

Baby lunchtime in the new house

Back to projects. First, and most important from our current housing perspective, we've been able to move several bulky and seldom-used items to the new place. We're thrilled to have even a little more floor and storage space in our current apartment! The stuff we've moved is mostly on a shelving unit I made for the barn. (Commercial "tough" shelves run about $50 on sale; I made some shelves out of dimensional lumber and OSB, at least double the size, for about the same price. Pics below.) Storing things in the barn necessitated CLEANING the barn - somehow every single surface was coated with dust, cobwebs, and hay. I have no idea how hay was spread so evenly on every single surface. For example, the south "room" of the barn: (check out those ceiling joists!)

The north end of the barn is a more recent addition, and we decided to use this portion for storage. This is the only real "room" in the barn - it's actually somewhat isolated from the main structure. You can see the red wall of the original barn structure.

The rest of the barn is split into three "rooms" by horse stalls, most of which I'll eventually remove). I spent several hours shop-vac-ing the floor and walls of the north room, and removed a few horse stall doors, and we have some clean(er) storage space.

The whole point of waiting to move into the house is to prevent dust from getting in all our stuff, and to prevent our stuff from getting in the way of remodeling. Barn storage is perfect, and much appreciated! Here's the shelf in position in the north room, with just a few early storage items. It has since been filled considerably.

Meg's first dive was into wallpaper removal. She first tried some spray-on gel, which did almost nothing. Then she tried a steamer (interestingly, $5 cheaper at Home Depot than Lowes...), and it worked wonderfully!

Before & During:


My first project inside the house was the kitchen. Started with the light fixture, so I could see what I was doing for the rest of the projects. This new fixture takes two circular tube bulbs, one the same size as the previous fixture and one larger, so it's more than twice as bright. And I think it looks just a little better...
Before & After:


The next kitchen job was exploring inside the wall that we'd like to remove, and replace with an island. This will open up a lot of space between the kitchen & dining room, and give us a little more floor and counter space in the kitchen.
A series of progress shots:

Getting ready to pry off the first piece of trim! Soon after this picture was taken, I removed both the upper & lower cabinets visible at right.


(Yes, there is a layer of CARDBOARD in the wall, underneath the brick-print linoleum stuff...)

It's hard to identify the various wall-covering materials from the picture, but just in this one wall section, I removed drywall, plaster & lath, and tongue & groove boards.

Most of the wall covering is removed, most of the dust, plaster, insulation, and nastiness is shop-vac-ed up. (I put the shopvac outside and used a long hose, and wore a mask or respirator the whole time, just assuming there is lead, asbestos, arsenic, or other nasties in the dust.) This was apparently an outside wall at some point, and framing for a window and door are clearly visible. Note that there is NO header beam, and most of the existing studs are not directly above anything that can bear weight - so it shouldn't be any problem to remove this wall. Can't wait to open it up!

Here's a view from the other side of this wall. I stacked a few cabinets where we will eventually put the island.

Next stop: the bathroom. Started by removing the carpet, which in my opinion resulted in an immediate improvement to the room!

(Our plan is to move the door out to the arched entryway, and remove the wall that was added in front of the tub.)


Speaking of carpet, I removed some colorful shag (and ceiling tiles) from two upstairs bedrooms:


The third upstairs bedroom (the one we'll eventually turn into a bathroom) doesn't have carpet, but it does have FOUR different types of vinyl/linoleum floor coverings:

And finally, I started exploring in the wall of what will become our laundry room. This was necessary to figure out how we'll run plumbing into this room. This room was an addition (maybe 1950's?), and the crawlspace underneath it has almost no access and is way too shallow to maneuver. Anyway, here's the wall as I started removing plaster and lath. To remove the plaster, I first scored the wallpaper with a knife, then used a masonry chisel to define the boundary of my section and start shattering the plaster. It came off quite easily once I had chiseled in around the edges. When I could see that there was no wiring or plumbing behind the lath, I cut down along the studs with a sawzall.
Note that the lath is a mix of milled boards (straight, rectangular) and "accordion lath," or wider boards that were split apart along their grain (wavy, angled gaps) and "stretched" before nailing. As with most old wood stuff, I find it fascinating.

Lo and behold, I found my first old-house-wall-treasure! I was expecting to find odd stuff in the walls, and while it's probably not monetarily valuable, I though this was a good find.

An old flashlight, with the switch in the "on" position. I wonder if someone was looking down from the attic and dropped it? Pretty cool, anyway.
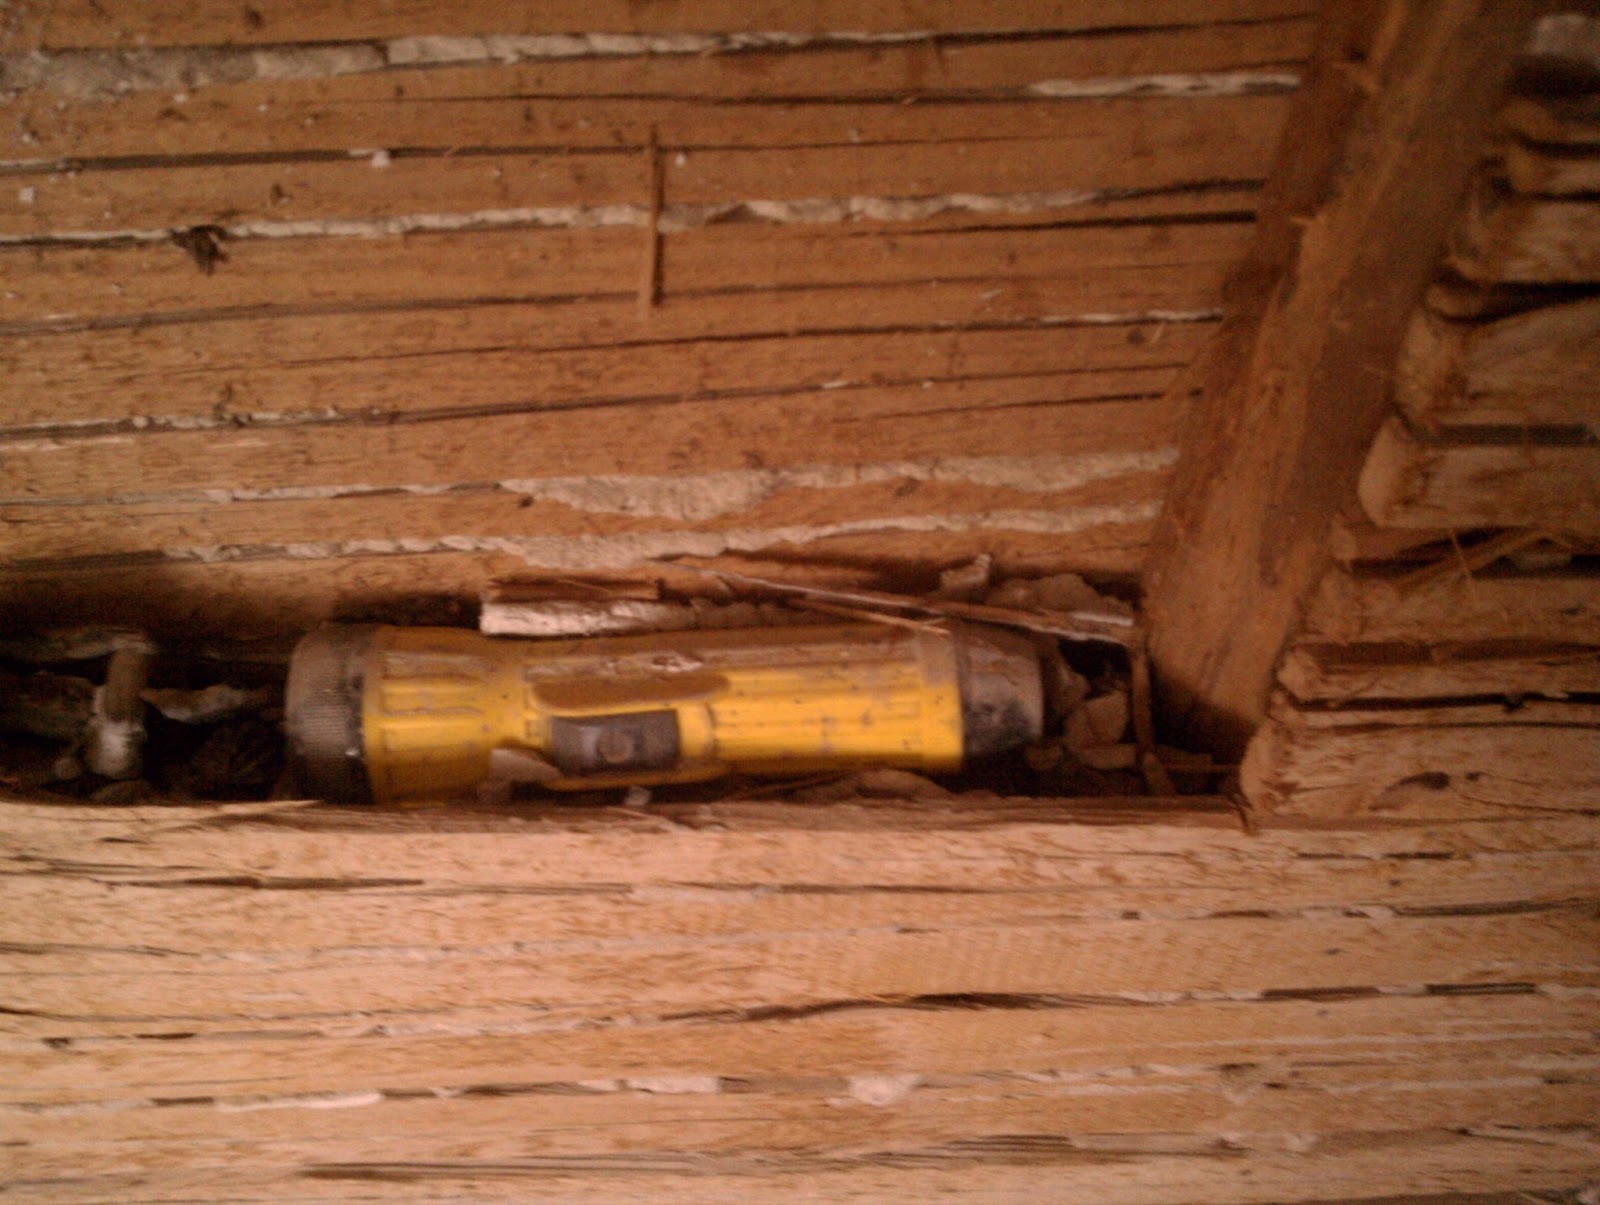
And why was the flashlight sitting in the wall a foot above the floor? It was resting on my next wall surprise - HUNDREDS of butternuts, mixed into a mass of pine needles and small corncobs. After the trees leaf out, it will be interesting to see whether there are any butternuts around... But the only 50+ year-old trees in the immediate vicinity are red pines, oaks, and maples, so I suspect the tree that bore these nuts is long gone.

This is more of the squirrel stash - not including the significant portion that'd already been vacuumed up.


I've also spent quite a bit of time over the past few days talking to general remodeling contractors and plumbers, so as soon as they get back to me with estimates, we'll probably be starting the professional side of some projects. We're definitely going to hire someone to connect us to public water (must be a licensed plumber, and that's way beyond my experience or comfort level), and replace the roof (I have a little bit of experience with roofing, but it was a long time ago, I definitely wouldn't want to work up there alone, and it would take me way too long to re-learn and do it all on my own.) We'll probably also hire someone to do most of the interior plumbing, refinish the oak floors, and install a few windows. Beyond that, I'll see how much I can accomplish on my own in the next ~2 months! It also looks like I'll be able to work something out with the contractor where I can do the demolition work (removing walls or windows), they do the basic installation of the new stuff, and I'll do the finish work. We'll see what is most efficient in terms of time and budget.
Cool blog post!
ReplyDeleteNot sure why you'd remove those sweet vintage wall and floor coverings. . . but to each his own!
Bathroom carpet eh?
On a serious note, gorgeous place. It's gonna be great!